Customize the Enterprise Portal (Alpha)
This topic describes how to customize the Enterprise Portal, including using a custom domain, changing the branding, editing the content of invitation and notification emails, and adding custom documentation.
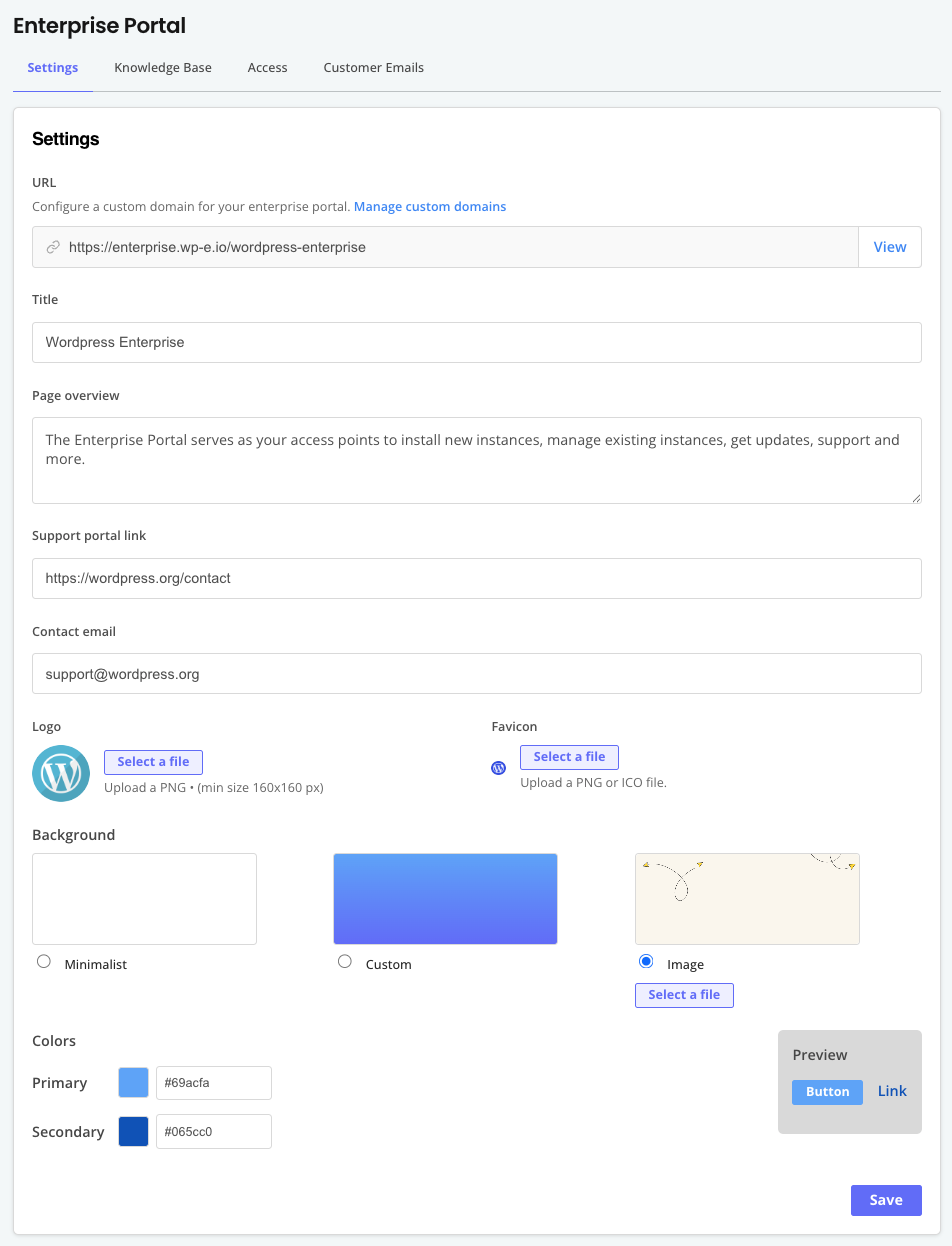
Manage Enterprise Portal Settings
You can edit the settings for the Enterprise Portal to use a custom domain, provide custom links and contact information, customize the look and feel of the Enterprise Portal, and more.
To manage Enterprise Portal settings:
-
In the Vendor Portal, go to Enterprise Portal > Settings.
-
Edit the settings as desired:
Field Description URL The URL where customers can access the Enterprise Portal. You can change the URL to use a custom domain. For information, see Use Custom Domains. Title The title of the Enterprise Portal. The title is displayed at the top of each page in the Enterprise Portal and is also used in email notifications. Page overview An overview of the Enterprise Portal. Support portal link The URL for the portal that your customers can use to get support. This link is provided on the Enterprise Portal Support page. Contact email The email address that customers can use to contact you. This email address is provided on the Enterprise Portal Support page. Logo Upload a custom PNG logo for the Enterprise Portal. The minimum size for the logo is 160px by 160px. Favicon Upload a custom favicon for the Enterprise Portal. The favicon is displayed in the browser tab. Background Select or customize the background for the Enterprise Portal. Colors Set the primary and secondary colors for the Enterprise Portal. -
Click Save.
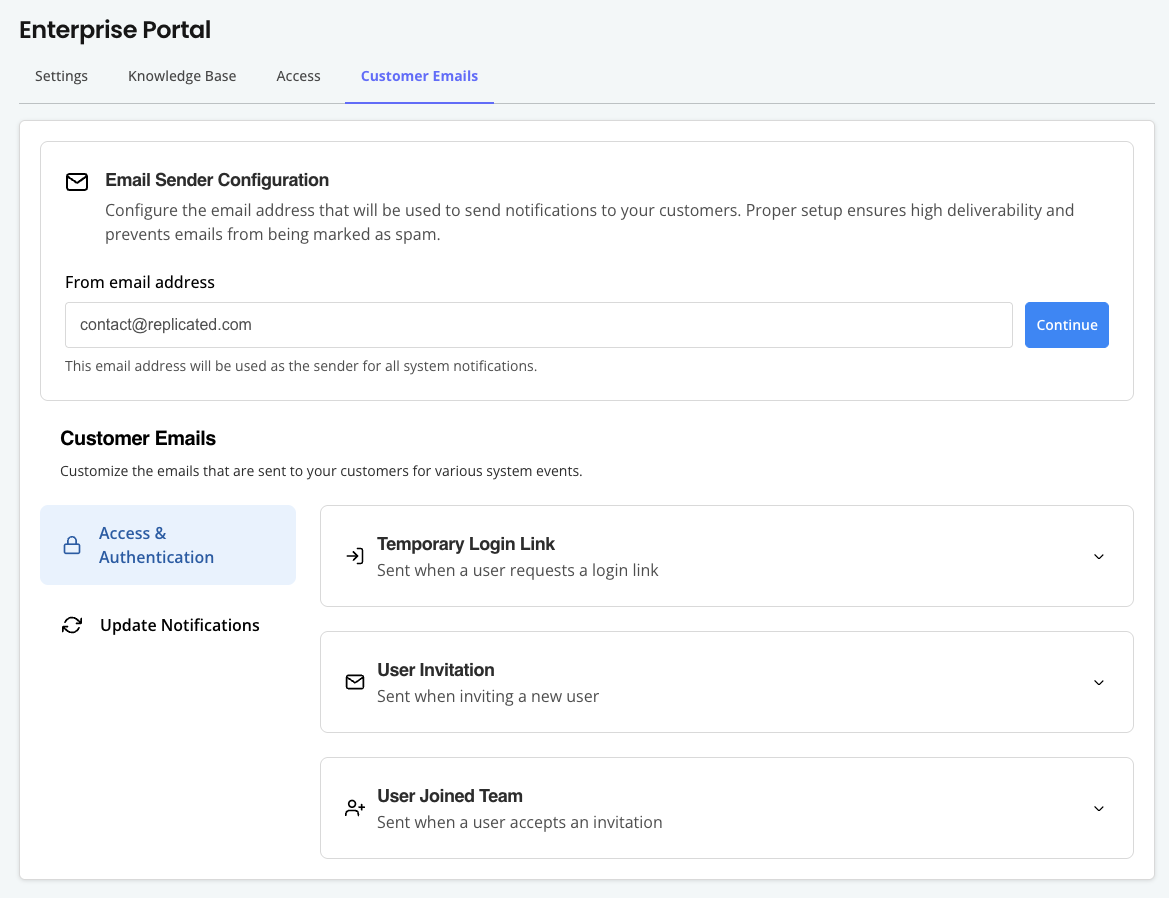
Configure Invitation and Notification Emails
You can customize the invitation and notification emails that are sent to your customers.
To configure customer emails:
-
In the Vendor Portal, go to Enterprise Portal > Customer emails.
-
For Email Sender Verification, in From email address, add the email address that you want to use as the sender for all system notifications sent to your customers, then click Continue. Adding a sender address helps ensure that your emails are delivered and are not marked as spam.
After the domain is verified automatically, the email address is displayed under Verified Sender Address.
-
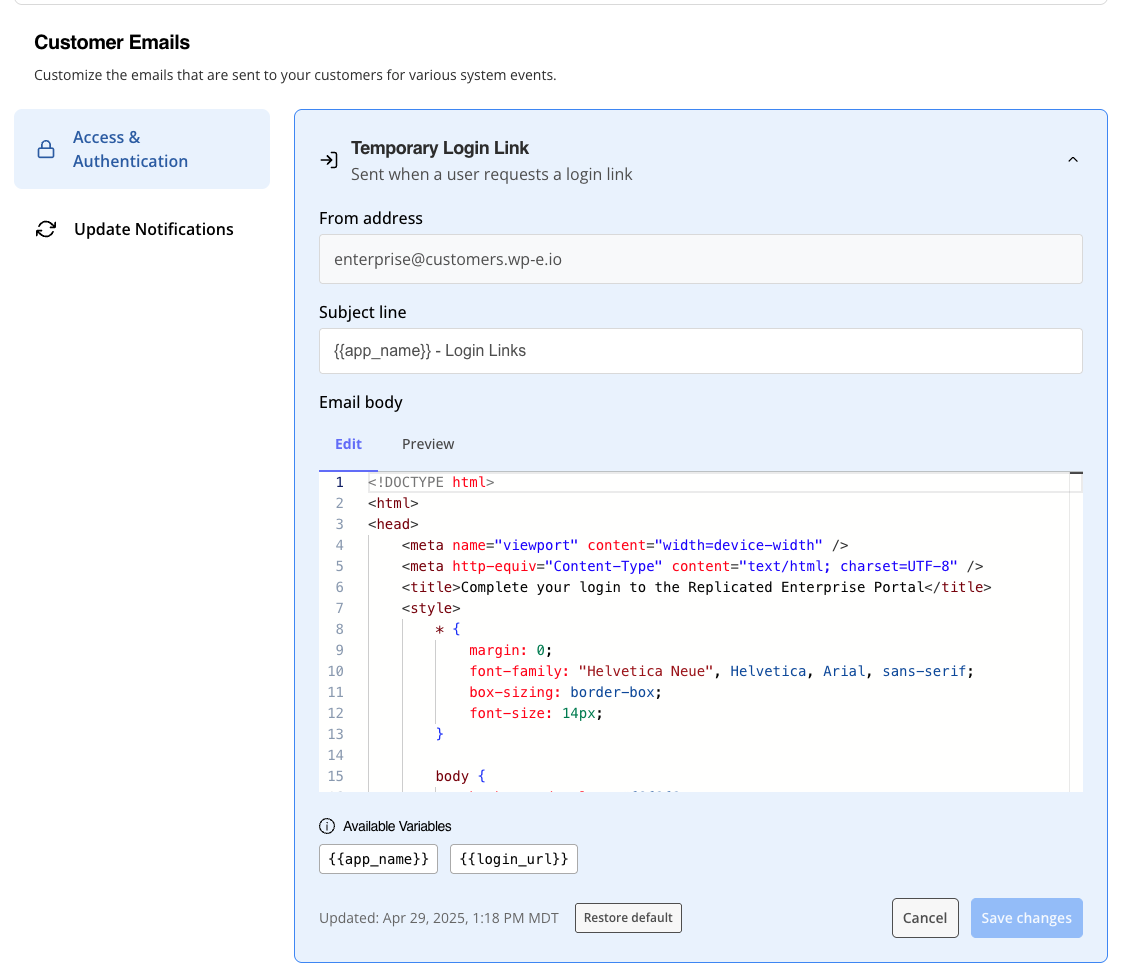
For Customer Emails, customize the subject line and body of the emails that are sent to your customers for various system events.
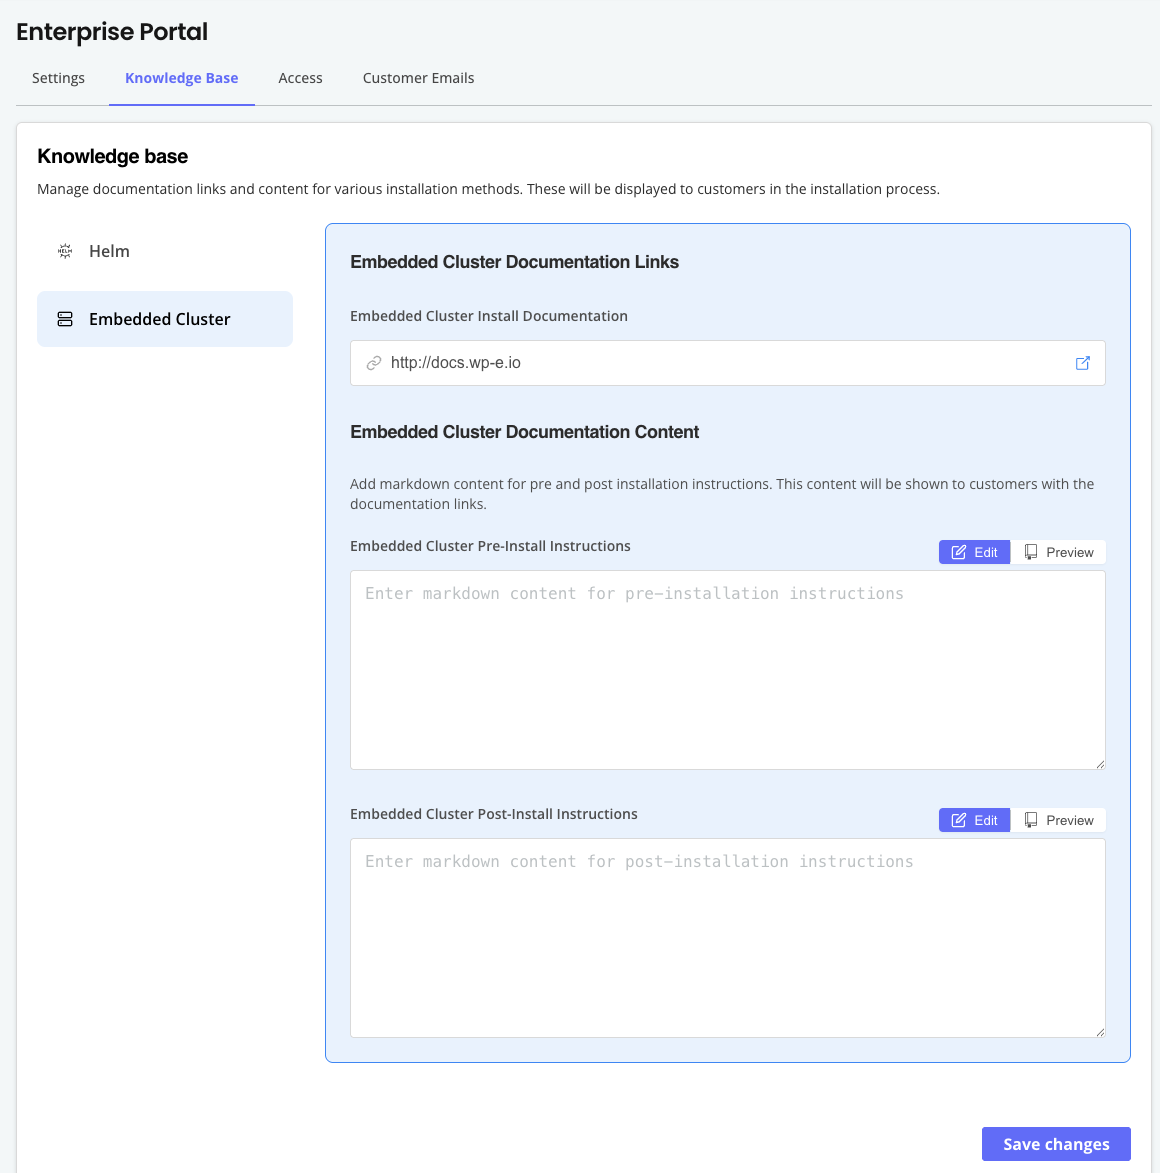
Customize Documentation
The install and update instructions available in the Enterprise Portal are automatically generated based on the install types and options enabled in the customer's license. For more information about managing the installation types and options, see Manage Install Types for a License.
You can also customize the documentation that is displayed in the Enterprise Portal by including a link to your installation instructions or by adding your own pre- and post-installation instructions.
To customize documentation:
-
In the Vendor Portal, go to Enterprise Portal > Knowledge Base.
-
In the panel on the left, select the installation type.
-
Customize the documentation for the selected installation type as desired:
- In the documentation links section, add a link to your installation documentation. The link is displayed on the Enterprise Portal Install page.
- In the documentation content section, add pre- and post-installation instructions in markdown format. Click Preview to see a preview of your changes.
-
Click Save changes.